You press the brake pedal, and your trailer barely slows down. The brake controller shows full gain. The wiring checks out fine. Yet your stopping distance keeps getting longer — and that unsettling push you feel from behind tells you something is wrong deep inside the brake assembly.
The culprit often hides in plain sight: your brake magnets.
These small electromagnetic discs sit at the heart of every electric trailer brake system. When they wear out, short internally, or lose their electrical connection, your entire braking system degrades — quietly, gradually, and dangerously. The frustrating part? Bad magnets often produce symptoms that mimic other problems, which leads owners to chase wiring issues or controller settings while the real fault sits inside the drum.
At Weifang Top Trailer Accessories, we manufacture complete electric brake assemblies for trailers across North America, Australia, and New Zealand. Our engineering team sees failed magnets from every possible cause — wear, contamination, electrical faults, and manufacturing defects. This guide helps you identify, test, and fix failing brake magnets before they become a road hazard.
What a Brake Magnet Does — and Why It Matters
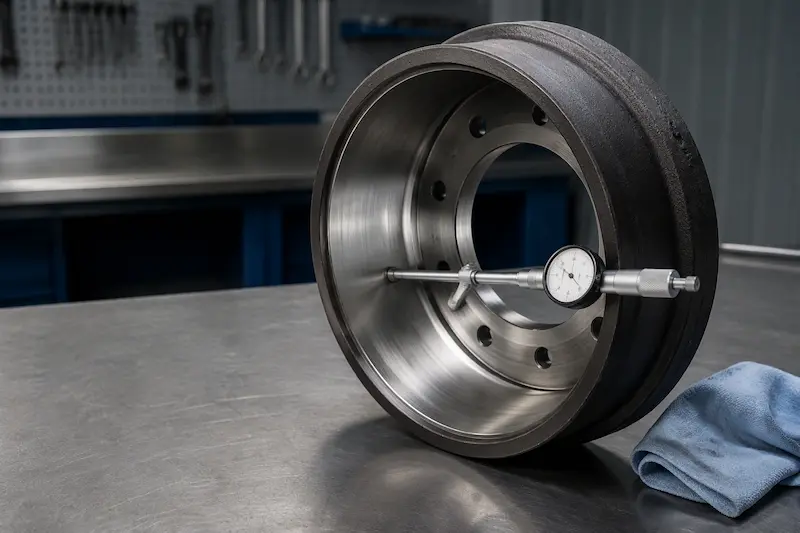
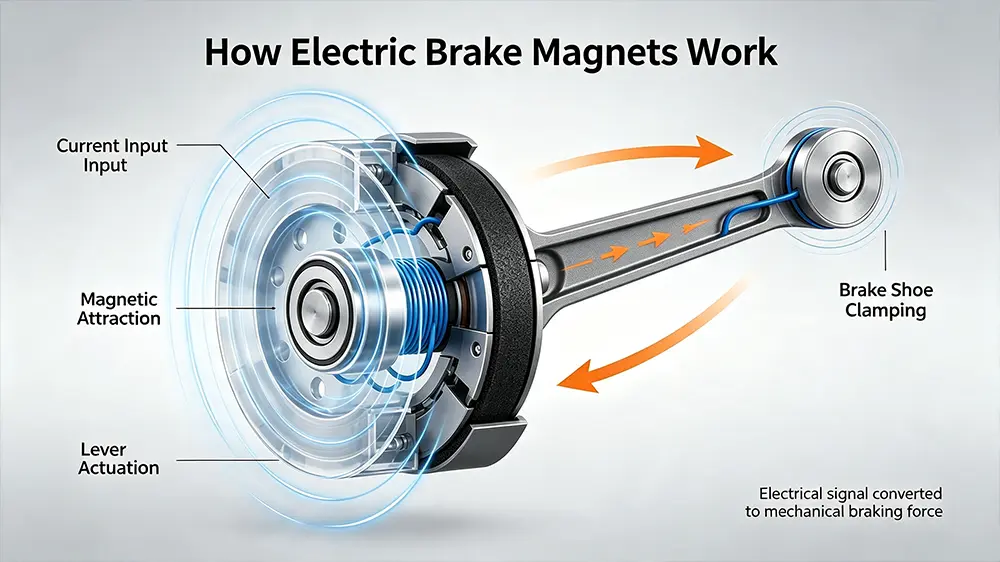
Before diving into failure signs, understand how the magnet works. An electric brake magnet is a circular electromagnet mounted on the end of a lever arm inside the brake assembly. When your brake controller sends current through the blue wire, the magnet energizes and grips the flat inner face of the rotating brake drum.
This magnetic grip does not stop the drum directly. Instead, the magnet rotates slightly with the drum, and that rotation actuates a cam or lever that forces the brake shoes outward against the drum’s friction surface. The harder the magnet grabs, the stronger the shoes press against the drum. More current equals more braking force.
When the magnet fails, this entire mechanical chain breaks. No magnet grip means no shoe actuation means no trailer braking — regardless of what your controller display says.
8 Warning Signs Your Brake Magnets Are Failing
Bad magnets produce recognizable symptoms. Unlike wiring faults (which often appear suddenly after a bump or a turn), magnet problems tend to develop gradually and worsen over time. Here is what to watch for:
Symptom 1: Weak Braking Despite Maximum Gain
You crank the brake controller gain to its highest setting, and the trailer still barely slows down. The manual override lever pushes full voltage, yet the trailer rolls forward with minimal resistance. This pattern — maximum electrical output producing minimal mechanical braking — points directly to worn or failed magnets. Healthy magnets translate electrica
l current into strong mechanical grip. Worn magnets simply cannot grab the drum hard enough, no matter how much power you send.
Symptom 2: Uneven Braking — Trailer Pulls to One Side
When you brake, the trailer tuggs noticeably left or right. This happens because one side’s magnet grips while the opposite side’s magnet slips. Uneven magnet wear — where one magnet face has worn significantly more than the other — causes the strong side to brake harder and pull the trailer toward it. If you have already ruled out axle alignment issues, test the magnets on the weak-braking side next.
Symptom 3: One Wheel Runs Hotter Than Others After Towing
After a highway tow, touch each brake drum carefully (or use an infrared thermometer). If one wheel is noticeably hotter, the magnet on that assembly may be dragging continuously. A shorted magnet can partially energize even without a brake signal, causing constant light contact between the magnet face and the drum. Alternatively, a mechanically stuck magnet lever arm causes the same symptom. Either way, you need to pull that drum for inspection.
Symptom 4: Brake Controller Displays a Short Circuit Error
Modern brake controllers — especially proportional models like the Tekonsha P3 or CURT TriFlex — actively monitor current draw. When a magnet coil shorts internally, it pulls excessive amperage, and the controller registers a “short circuit” or “overload” warning. Do not ignore this error. A shorted magnet stresses the controller and drains the tow vehicle’s electrical system while providing zero useful braking from that wheel.
Symptom 5: Brake Controller Displays an Open Circuit Error
An open circuit error means the controller detects no current flowing to the magnets. If you have confirmed the wiring and connectors are intact, an open circuit points to a magnet with a broken internal coil wire. The copper windings inside the magnet can fracture from vibration, corrosion, or simply age. Once the coil circuit breaks, the magnet becomes a dead electrical component.
Symptom 6: Braking Suddenly Worsens After Off-Road Use or Water
Large bumps, potholes, and water crossings stress the area where the magnet wire enters the backing plate. Most magnet wires route through a small rubber grommet at a sharp angle — and that entry point is the single most common physical failure location. If your brakes worked fine before a rough dirt road or a boat ramp submersion but now feel weak, inspect the magnet wire at the grommet first.
Symptom 7: Visible Copper or Metal Windings Through the Magnet Face
This sign requires no testing — just your eyes. Pull the drum and look at the magnet’s friction face (the flat surface that contacts the drum interior). A healthy magnet shows an intact, smooth friction material covering the entire face. If you see copper-colored metal windings or silver wire mesh showing through, the magnet has worn completely through its friction surface. The electromagnet windings now rub directly against the drum, which damages both components with every brake application.
Symptom 8: Intermittent Braking — Works Sometimes, Fails Other Times
Intermittent brake operation that comes and goes without any pattern often traces to a partially broken magnet wire. The wire strands inside the insulation hold together most of the time but separate under vibration or heat, momentarily breaking the circuit. These hairline fractures typically occur at the stress relief grommet. Intermittent faults are the hardest to diagnose because they work perfectly when you test them in the driveway.
Visual Inspection: What to Look For Before Testing
Pull each drum and perform a visual inspection before you reach for a multimeter. Much of the time, your eyes tell you the story immediately.
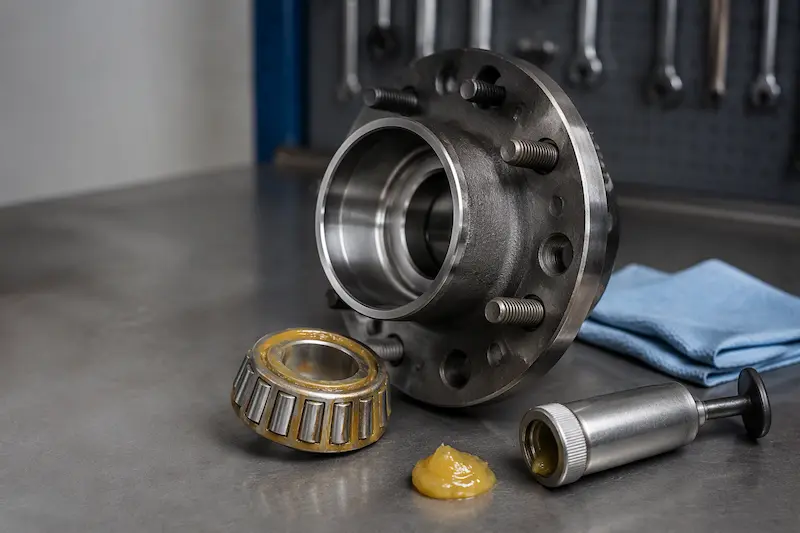
Remove the drum carefully. Jack up the trailer safely using a quality trailer jack, place jack stands under the frame, and remove the wheel. Pull the dust cap, remove the cotter pin and castle nut, and slide the hub-drum assembly off the spindle. Set the hub on a clean surface to protect the bearings.
Inspect the magnet face. The friction surface should appear smooth, flat, and uniform in color — typically dark gray or black. Look for:
- Exposed copper windings or silver wire mesh: Replace the magnet immediately. Continuing to run a worn-through magnet scores and ruins the drum’s inner face.
- Deep grooves or scoring: Light scuff marks are normal. However, deep grooves that catch your fingernail indicate the magnet has worn unevenly and needs replacement.
- Uneven wear across the face: One side worn thinner than the other suggests a mounting or alignment issue with the magnet arm. Replace the magnet and check the actuator arm for straightness.
- Contamination (greasy, shiny, or oily surface): Grease on the magnet face means a failed oil seal has allowed bearing grease to reach the friction surfaces. Replace the seal and the magnet — brake cleaner cannot restore a grease-soaked magnet.
- Cracks or chips: Physical damage to the friction material means the magnet can break apart under load.
Inspect the magnet wire. Follow the wire from the magnet body to the point where it passes through the backing plate grommet. Bend the wire gently near the grommet. If the insulation cracks or the copper strands feel stiff rather than flexible, the wire has fatigued at this stress point. A broken wire at the grommet means a magnet replacement — the wire cannot be reliably spliced that close to the coil body.
Compare left and right sides. Remove both drums and place the two magnets side by side for comparison. Mismatched wear patterns confirm uneven braking forces and help you identify the failing side before testing.
Quick Field Test: The Screwdriver Method
If you need an immediate answer and do not have a multimeter on hand, use the screwdriver test. This method does not tell you why a magnet has failed, but it definitively confirms whether power reaches the magnet and whether the magnet generates a magnetic field.
How to perform the screwdriver test:
- Reconnect the trailer 7-way plug to the tow vehicle.
- Have an assistant press and hold the manual override on the brake controller — this sends full available voltage to all magnets.
- Hold a large steel screwdriver close to the magnet face, without touching it. Position the tip roughly one-quarter inch from the friction surface.
- If the magnet is working, you feel a distinct magnetic pull on the screwdriver. A strong, healthy magnet pulls firmly. A weak magnet pulls gently or not at all. A dead magnet produces zero attraction.
Test all four (or two) magnets on the same setting to compare the pull strength side-to-side. Any magnet that pulls noticeably weaker than its counterparts has either a worn face, a high-resistance coil, or both.
Definitive Diagnosis: Testing Brake Magnets with a Multimeter
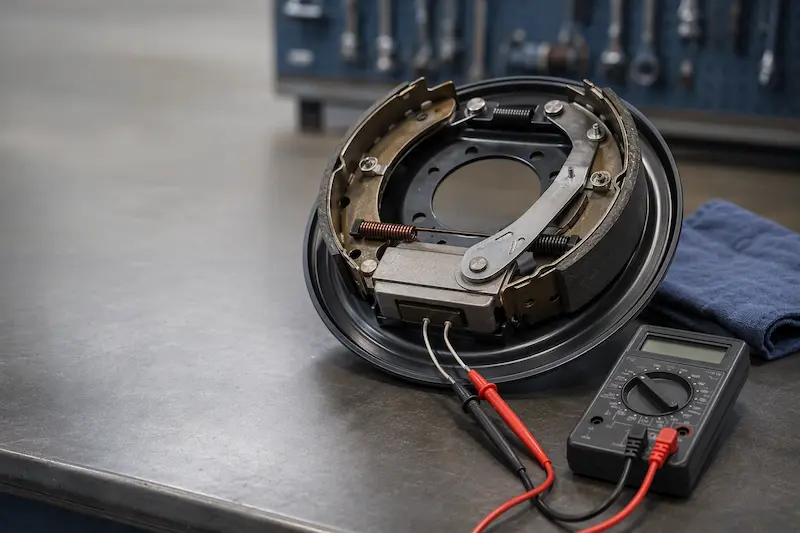
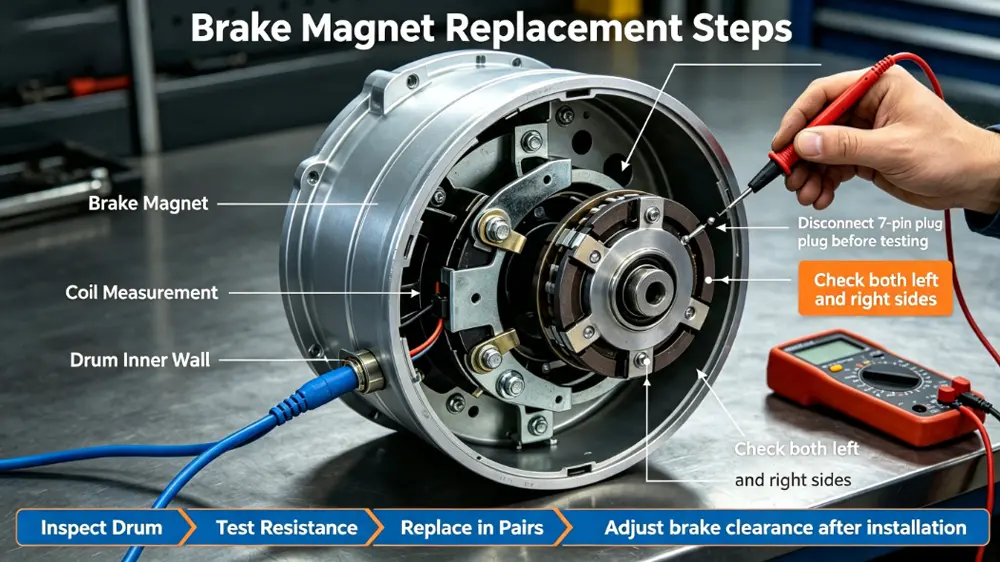
The resistance test provides the most reliable assessment of magnet health. You need a basic digital multimeter with an ohms (Ω) setting.
Important: Disconnect the Trailer First
Always unplug the trailer’s 7-way connector from the tow vehicle before testing. Testing magnets through the brake controller circuit risks damaging the controller and gives inaccurate readings, because all magnets connect in parallel through the wiring harness.
Step 1: Isolate the Individual Magnet
All brake magnets wire in parallel, so measuring at the 7-pin connector’s blue wire pin gives you the combined parallel resistance, not individual readings. To test a single magnet, disconnect its two wires where they connect to the trailer wiring harness, typically at a junction near the axle.
Step 2: Measure Resistance Across the Magnet Wires
Set your multimeter to the ohms (Ω) setting — the 200Ω range works best. Touch one probe to each of the two magnet wires. Polarity does not matter for this test.
An “OL” or infinite reading means the coil wire has broken internally — an open circuit magnet that produces zero braking.
A reading significantly below the range means the coil has shorted internally. The magnet pulls excessive current but delivers weak or unpredictable braking force. A shorted magnet also stresses the brake controller and may blow fuses on the tow vehicle’s brake circuit.
A reading within range but the magnet still performs poorly: the coil is electrically intact, but the friction face may be excessively worn. Move to the visual inspection and, if available, the amperage draw test.
Step 3: Test for Internal Short to Housing
This test catches a dangerous fault that the basic resistance test can miss. With the magnet still disconnected from the harness, place one multimeter probe on either magnet wire and the other probe on the bare metal body (housing) of the magnet itself.
Any continuity reading at all — any number, however small — means the magnet has shorted internally to its housing and must be replaced. A healthy magnet shows infinite resistance (OL) between the wires and the body. An internal short to the housing means current leaks to the trailer frame through the backing plate, which explains why your controller may show normal voltage at the connector yet the magnet fails to grip.
Step 4 (Optional): Amperage Draw Test
If you own a multimeter with a DC amperage function, you can verify the magnet draws the correct current under load. Connect the ammeter in series: positive battery terminal → ammeter positive lead → ammeter negative lead → one magnet wire. Connect the other magnet wire directly to battery negative.
A healthy 10-inch or 12-inch magnet draws 3.0 to 4.0 amps at 12–13 volts. A 7-inch magnet draws slightly less. Excessive amperage confirms an internal short. Insufficient amperage confirms high resistance or partial circuit breakage.
Common Causes of Premature Magnet Failure
Understanding why magnets fail helps you prevent repeat failures. Most magnet problems trace to one of these root causes:
Our earlier post on winter storage for brake systems and the guide to common brake lock-up causes cover additional maintenance practices that extend magnet life.
Step-by-Step: Replacing a Failed Brake Magnet
Magnet replacement does not require removing the entire brake backing plate. The magnet attaches to the actuator arm with a single bolt or retaining clip. Plan on approximately 30-45 minutes per wheel for your first replacement.
Tools and Supplies Needed
- Replacement magnet (matched to your brake assembly size and axle weight rating)
- Socket set and ratchet
- Screwdrivers (flathead and Phillips)
- Needle-nose pliers
- Wire strippers and crimpers
- Heat-shrink butt connectors or weatherproof splice connectors
- Dielectric grease
- Brake cleaner spray
- Torque wrench
- New cotter pin
- Jack and jack stands
Step 1: Remove the Hub and Drum
Jack the trailer safely, place jack stands, and remove the wheel. Pry off the dust cap carefully — a flathead screwdriver works for this step. Remove the cotter pin with needle-nose pliers, loosen and remove the castle nut, then slide the hub-drum assembly straight off the spindle. Set the hub on a clean, flat surface with the bearings facing up to avoid contamination.
Step 2: Document the Wire Routing
Before you disconnect anything, take a clear photo of how the magnet wire routes from the magnet body through the backing plate grommet and to the wiring harness connection point. Pay particular attention to how the wire clears the spring pack and the adjuster mechanism. You will route the replacement wire exactly the same way.
Step 3: Disconnect and Remove the Old Magnet
Disconnect the two magnet wires from the trailer wiring harness at the nearest junction point. Then locate the single bolt or retaining clip that secures the magnet to the actuator arm inside the backing plate. Remove this fastener and pull the old magnet out. If the magnet wire passes through a clip or retention slot inside the backing plate, note that routing as well.
Step 4: Install the New Magnet
Route the new magnet’s wires through the stress relief grommet in the backing plate before securing the magnet to the actuator arm. The grommet is nearly impossible to install with the magnet already bolted in place, so do this step first. Then bolt or clip the new magnet onto the actuator arm and torque to the manufacturer’s specification.
Step 5: Connect the Wiring
Connect the two magnet wires to the trailer wiring harness. Polarity does not matter for brake magnets — the two wires are interchangeable. Use weatherproof heat-shrink butt connectors, not standard crimp connectors or twist-and-tape connections, which invite moisture intrusion and corrosion. Apply dielectric grease inside each connector before crimping for additional moisture protection.
Step 6: Reinstall Hub, Drum, and Wheel
Slide the hub-drum assembly back onto the spindle. Install the castle nut and tighten it while spinning the hub by hand — this seats the bearings. Back the nut off slightly, then snug it finger-tight to set the preload. Install a new cotter pin through the castle nut slots and spindle hole — never reuse an old cotter pin. Tap the dust cap back into place with a rubber mallet.
Step 7: Adjust the Brakes and Plan for Break-In
New magnets change the brake shoe clearance. Adjust the star wheel through the backing plate adjustment slot until you feel a light, even drag when spinning the drum by hand. Then plan for a break-in period — new brake friction components, including magnets, typically require more than 100 moderate stops from roughly 20 mph before they deliver full rated braking performance. Braking will feel slightly softer than normal during this break-in period, so increase following distance accordingly.
Replace Just the Magnet — or the Entire Assembly?
One of the most common questions we hear: should you replace only the failed magnet, or buy a complete brake assembly? The answer depends on what you find during inspection.
As a rule, if you find two or more worn components in addition to the magnet, a complete brake assembly often costs less in total — especially when you factor in labor time — than replacing individual parts piece by piece. Our brake assemblies ship with new magnets, shoes, springs, adjusters, and backing plates, all pre-assembled and ready to bolt on.
Always Replace Magnets in Pairs
Dexter Axle and other major manufacturers specifically recommend replacing brake magnets in pairs — both sides of the same axle at the same time. Here is why this matters for safety:
- If one magnet has failed from wear, the opposite side’s magnet has experienced the same mileage and conditions. It sits near the end of its service life even if it still tests within range.
- Mismatched magnets on the same axle create uneven braking forces. The new magnet grips harder than the old one, which pulls the trailer toward the new magnet’s side during hard stops.
- Uneven braking increases tire wear on the stronger side because that tire scrubs and skids more during every stop.
Replace both magnets on the same axle together, test the system with a multimeter after installation, and perform the gain adjustment procedure at 25 mph on a flat road.
Frequently Asked Questions (FAQ)
How long should trailer brake magnets last?
No universal mileage number applies because magnet life depends heavily on usage conditions. Well-maintained magnets on properly adjusted brakes often last 30,000 to 50,000 miles. Magnets on chronically under-adjusted brakes can fail in a fraction of that distance because the magnet face travels farther to contact the drum on every brake cycle, accelerating wear. Saltwater boat trailer magnets typically fail sooner due to corrosion.
My brakes work on manual override but not when I press the brake pedal. Is this a magnet problem?
Almost certainly not. If the magnets engage with the manual override, they receive power and function electrically. The problem sits in the brake controller’s signal circuit — specifically, the red wire that connects to the brake light switch may not see voltage, or the controller’s internal sensor has failed. Check the red wire connection at the brake pedal switch first.
Can I clean a grease-contaminated magnet instead of replacing it?
No. Once bearing grease soaks into the magnet’s friction face, no cleaning method reliably restores its friction coefficient. Brake cleaner removes surface grease but cannot extract oil that has penetrated the friction material. A greasy magnet slips against the drum instead of gripping — and that slip generates heat that bakes the grease deeper into the material. Replace the magnet and the failed oil seal that caused the contamination.
What happens if I keep driving with a known bad magnet?
Several things, none of them good. The trailer loses braking force on that wheel, which means the remaining functional brakes must handle the full stopping load. This overloads the good brakes and causes them to wear faster. The trailer pulls toward the functional side during stops, which can cause a dangerous lane change or jackknife in an emergency braking situation. If the bad magnet shorts to the housing, it may blow the brake controller fuse and disable the entire trailer brake system — leaving you with zero trailer braking.
Can I test all magnets at once through the 7-way connector?
You can get a rough combined reading if you measure resistance between the blue wire pin and the white ground pin on the 7-way, but this tells you the total parallel resistance of all magnets together, not individual magnet health. For example, four healthy 3.5-ohm magnets in parallel read approximately 0.875 ohms combined. A single shorted or open magnet often gets masked in the combined reading. Test each magnet individually for a definitive diagnosis.
My brake controller shows correct voltage at the output but the magnets test dead. What gives?
Voltage at the controller output confirms the controller and vehicle wiring work. The fault sits somewhere between the 7-way socket and the individual magnet connectors. Check these points in order: the 7-way plug for corroded blue wire pin, the junction box or splice connections on the trailer tongue, the wire routing along the frame rails for cuts or rodent damage, and the individual magnet wire connectors at each axle. A wire that carries voltage at the front but shows zero volts at the magnet has a break somewhere along that path.
Catch Failing Magnets Before They Catch You Off Guard
Brake magnet failure rarely announces itself dramatically. The symptoms creep in — slightly longer stops last month, a faint pull to one side this week, a controller error code that comes and goes. By the time you notice a serious problem, at least one magnet has likely been underperforming for thousands of miles.
The good news: testing takes minutes. A multimeter costs less than a single tow truck call. And visually inspecting your magnets when you service your wheel bearings adds no extra labor to an already-planned maintenance session.
If your inspection reveals worn or failed magnets, browse our complete brake assemblies — every unit ships with a new magnet, shoes, springs, and backing plate, pre-assembled and ready to install. We also stock replacement drums, axle components, and seals for a complete brake system refresh.
Contact Weifang Top Trailer Accessories for OEM pricing, technical specifications, or custom orders. We ship directly to the United States, Canada, Australia, and New Zealand from our manufacturing facility in Shandong, China.